How to Install Rubber Roofing: Complete EPDM Installation Guide
Setting up a durable, weather-resistant roof is critical for homeowners, especially in the challenging northern climates of Minnesota and Wisconsin. If you’re seeking an efficient, effective solution for flat or low-slope roofs, EPDM rubber roofing might just be the perfect fit. This guide will show you how to set up EPDM roofing step by step while exploring its advantages for regional homeowners.
What is EPDM Rubber Roofing
EPDM (Ethylene Propylene Diene Monomer) is a synthetic rubber roofing material prized for its exceptional flexibility, strength, and resistance to harsh weather. Widely used for flat and low-slope roofing systems, it’s an ideal choice for homes and commercial properties alike.
Why is installing a rubber roof a game-changer for flat roofs?
Thanks to its gravity-proof capabilities, EPDM works exceptionally well for roofs with minimal slopes, ensuring effective water drainage without leaks or damage. Additionally, it performs exceptionally in the Midwest’s harsh conditions by withstanding freezing winters and snowy climates.
Benefits of Synthetic Rubber Roofing for Northern Midwest Homes
Choosing epdm membrane comes with unique benefits tailored to northern Minnesota and Wisconsin weather challenges:
Exceptional Durability
The tough rubber composition ensures that the rubber membrane holds up against severe winter storms, ice dams, and freeze-thaw cycles.
Energy Efficiency
EPDM cover can help insulate homes during the cold months, reducing energy costs.
Cost Effectiveness
EPDM is less expensive than many other roofing options, like metal, making it accessible for budget-conscious homeowners while offering a superior return on investment.
Low Maintenance
Unlike traditional shingles, synthetic rubber requires minimal maintenance, even in regions with heavy snowfall.
Flexible Application
Whether you own a residential home or a commercial property in the region, EPDM adapts seamlessly.
Professional vs DIY install a rubber roof Installation: Making the Right Choice
When considering a rubber flat roofing setup, you have two routes to explore. Depending on your skill level, budget, and roof complexity, one option may suit you better than the other:
When to Choose Professional Installation
Complex Roof Designs
Professional installers are better suited to handle intricate roof shapes or multiple penetrations, such as chimneys and vents.
Local commercial building Codes
Experienced contractors are familiar with Minnesota and Wisconsin building codes and ensure compliance.
Ice Dam Prevention
Professional roofers often incorporate ventilation techniques to minimize ice dams, a common problem in the Midwest.
Insurance & Warranties
Licensed contractors typically provide workmanship warranties and ensure insurance guidelines are met.
DIY Installation Considerations
Setting up an EPDM roof yourself can save costs, but it requires some knowledge:
- Flat or flat roofs are easiest for DIY.
- You’ll need basic roofing tools and materials.
- Be prepared to commit time and attention to detail to avoid common errors like air bubbles or improper sealing.
Tools and Materials Needed for install epdm Successful Installation
Essential Tools
- Measuring tape
- Utility knife
- Roller
- A broom or a brush for cleaning debris
Required the entire roofing material
- EPDM membrane
- Adhesives and primers
- Seam tapes
- Flashings and trim pieces
Safety Equipment
Don’t underestimate safety. Equip yourself with a safety harness, gloves, non-slip shoes, and protective eyewear.
Pre-Installation Assessment and Preparation
Evaluating Your Existing Roofing Systems
- Before beginning installation, determine if your roof can accommodate a rubber flat roofing system:
- Ensure sufficient load-bearing capacity for additional materials.
- Inspect decking for structural integrity and moisture damage.
Can you glue EPDM on Plywood?
Yes! Plywood is generally compatible with EPDM, but it needs proper preparation:
- Ensure the plywood is clean, dry, and free of sharp points or nails.
- Use a moisture-resistant underlayment or primer.
Step-by-Step Rubber Roof Installation Process
Step 1: Prepare the roof deck
- Start by thoroughly cleaning your old roof deck and removing debris.
- Inspect for damage and repair weak or soft spots.
- Ensure the surface is level and ready for the excess membrane.
Step 2: Measuring and Cutting the Rubber Membrane
- Accurately measure the roof area and allow for overlap at seams.
- Cut the EPDM membrane according to your measurements.
- Lay it out in the sun to relax, which helps with easier application.
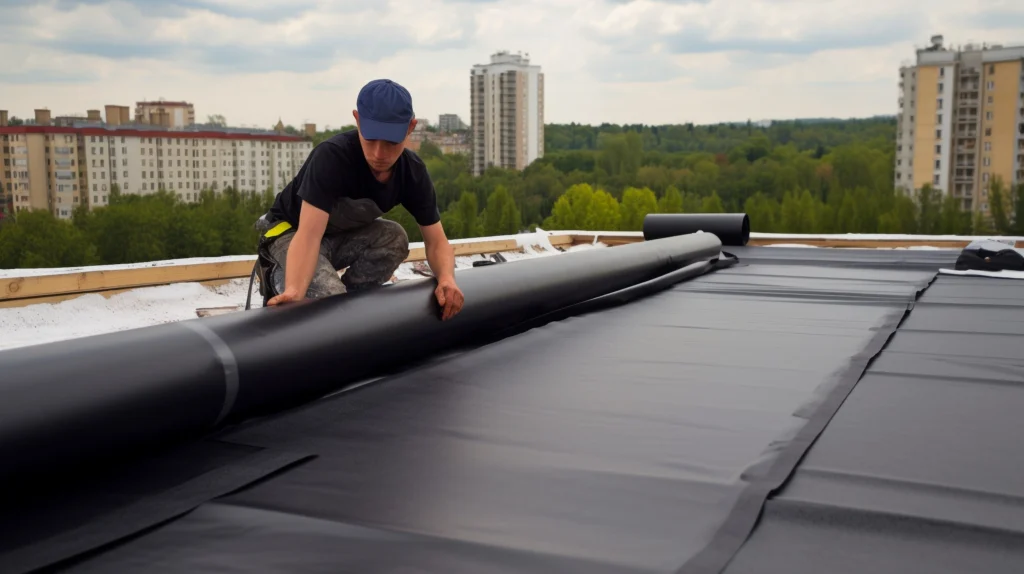
Step 3: Positioning and Unrolling the Membrane
- Roll back the membrane partially and align it correctly on the roof.
- Smooth out wrinkles and air pockets as you position it into place.
Step 4: Adhesive Application and Membrane Attachment
- Depending on your roof type, you may need full adhesion or partial adhesion.
- Apply adhesive is applied evenly in sections, and the membrane is pressed down firmly, fully adhered.
Step 5: Securing the surface of the roof
- Use seam tape and adhesive to seal the edges and overlaps securely.
- Ensure proper sealing around vents, chimneys, and roof edges.
- Add trim pieces for a finished look and enhance protection against water infiltration.
Common Installation Challenges and Solutions
What Causes Air Bubbles in EPDM and How to Avoid Them
- Causes: Uneven adhesive application or improperly cleaned roof decks.
- Fix: Use a roller to remove bubbles or slit the area, apply adhesive, and reseal.
Dealing with Complex flat or low-slope roof Shapes
Complex shapes around chimneys and vents require:
- Customized flashing installation.
- Special seam tape techniques to create watertight seals.
EPDM Roofing Installation Cost Breakdown
DIY vs Professional Proper Installation Costs
- DIY Materials: Around $3-$4 per square foot for membrane and supplies.
- Professional Costs: $6-$12 per square foot, inclusive of materials and labor.
Long Term Cost Benefits
The longevity and energy efficiency of EPDM roofs provide significant ROI over time. Compared to shingles, they require fewer repairs and offer better insulation.
Maintenance and Care for Your New EPDM Roof
- Schedule inspections every six months or after major storms.
- Clean your roof with mild soap and water to prevent debris buildup.
- Repair minor tears promptly to avoid water infiltration.
Professional EPDM Roof Installation Services
For homeowners in northern Minnesota and Wisconsin, professional services like Miller’s Roofing & Siding provide expertise in installing EPDM roofing. With over 30 years of experience, they understand the local climate needs and ensure long-lasting results.
Get in Touch with Miller’s Siding & EPDM Roofing Contractor Today!
Call now or fill out our online form to schedule a consultation or get a free estimate. Take the first step toward a more durable and efficient roof today.

